How to Make a Website on your own in 2024
A free, step-by-step guide for making a website in half hour or less.
Why Do We Need a Website in 2024?
In the digital age, having a website is crucial for individuals and businesses alike. Here are some reasons why:
1. Business Presence
In 2024, a staggering 4.9 billion people are using the internet. This means that without a website, businesses are missing out on reaching a vast pool of potential customers.
Why does my business need a website?
A website allows businesses to establish an online presence, reach new customers, showcase products/services, build trust and credibility, sell online, and boost marketing efforts. For example, Amazon has become a global leader in e-commerce, largely due to its user-friendly website and wide range of products.
Pointers:
- Highlight your unique selling proposition. For instance, Everlane, a clothing company, stands out by offering transparent pricing.
- Offer valuable content and resources. HubSpot does this well by providing informative blogs and free resources on digital marketing.
- Make it easy for users to contact you. Airbnb has a clear ‘Contact Us’ section, making customer service accessible.
2. Personal Branding
In the interconnected world of 2024, a website can serve as a platform for individuals to share their expertise, build a portfolio, connect with others, promote creative work, and establish themselves online.
How can a website help me personally?
Consider Tim Ferriss. His website acts as a hub for his books, podcast, blog, and about his life philosophy.
Pointers:
- Focus on your niche and target audience. Seth Godin, a renowned marketing expert, has a blog dedicated to sharing his insights on marketing and life.
- Create engaging and informative content. Neil Patel’s website is a great example of providing valuable content in the field of digital marketing.
- Network with other professionals in your field. LinkedIn, for example, allows you to connect with professionals and share your own content.
3. Community Building
Websites can also serve as a platform for community building. They can facilitate communication, share information, organize events, raise awareness, and connect members virtually.
What can a website do for my community/group?
Take Reddit for example. It’s a network of communities based on people’s interests. It allows users to discuss and vote on content that other users have submitted.
Pointers:
- Create forums, discussion boards, and chat rooms. Websites like Stack Overflow provide a platform for developers to ask questions and share their knowledge.
- Share news and updates regularly. The Verge does a great job of keeping its community updated with the latest tech news.
- Encourage user interaction and feedback. Facebook allows users to share their thoughts, photos, and engage with other users.
4. Creative Expression
A website can be a canvas for creative expression. It can showcase artwork, photography, writing, music, or other creative endeavors. It can also help build an online portfolio, share stories, and connect with other creative individuals.
How can I use a website to express myself creatively?
DeviantArt is a platform where artists share and sell their work, while Medium allows writers to publish their articles and build a following.
Pointers:
- Design a visually appealing website that reflects your style. Apple’s website, known for its clean and modern design, reflects the company’s design philosophy.
- Use high-quality images and videos. National Geographic’s website showcases stunning photography from around the world.
- Engage with your audience through comments and social media. YouTube creators often interact with their audience through the comments section and community posts.
5. Earning Income
In 2024, the potential for earning income through a website is vast. You can earn revenue through advertising, affiliate marketing, selling products/services, online courses, or subscriptions.
Can I generate income through a website?
Absolutely. Take Patreon for example. It allows creators to earn a monthly income by providing exclusive rewards and perks to their subscribers.
Pointers:
- Choose a monetization strategy that aligns with your website’s purpose and audience. ProBlogger, for instance, makes money through affiliate marketing, e-books, and online courses.
- Provide valuable content that incentivizes users to pay. MasterClass offers high-quality classes taught by industry professionals.
- Ensure a smooth and secure user experience for transactions. PayPal offers users a secure way to make online payments.
6. Freelancing and Professional Independence
In the gig economy(I know this is a bit overstretch) of 2024, a website can serve as a platform for freelancers to showcase their skills, portfolio, and services. It provides a professional front that can help attract potential clients and if cards played right then projects as well.
How can a website help me as a freelancer?
Consider the example of a freelance graphic designer. Their website can display their portfolio of work, list the services they offer, provide contact information, and even include client testimonials.
This not only helps in attracting new clients but also builds credibility.
Use website to do these:
- Showcase Your Work: Use your website to display your best work. For instance, a freelance photographer can have a gallery of their best shots. A web developer can showcase recent projects.
- Highlight Your Skills: Clearly list the services you offer and the skills you bring. A freelance writer, for example, might list services like blog writing, copywriting, and content strategy.
- Include Testimonials: If you have testimonials from past clients, include them on your website. This can help build trust with potential clients.
- Make It Easy to Contact You: Include a contact form or your professional email on your website, making it easy for potential clients to reach out to you.
In conclusion, whether you’re a business owner, a college student, a digital marketer, a developer, or a fresher blogger, having a website in 2024 is not just beneficial, but necessary. It’s time to make your mark on the digital landscape!
Free guide on how to make a website on your own in less then an hour.
Now you know why you need a website and you are ready to spend this next hour in setting a solid website where you will own your data and will be responsible for making all the changes required.
The best part is, you don’t need to know any code for this. You don’t have to spend hundreds if not thousands of dollar for your website by hiring a web developer or designer.
Let’s get started.
Step 1: Choose a domain name for your website.
Just as every business requires a physical address, every website needs a domain name. This task, while straightforward, can also be daunting.
With over 100 million domain names already in existence on the internet, choosing a unique domain name can feel overwhelming. However, with the right approach and tools, you can find a domain name that perfectly represents your online presence.
Remember, a good domain name is not just an address, it’s your brand’s digital identity.
So, take your time and choose wisely!
By keeping few rules and steps in mind while choosing a domain name, you can be sure that you are doing this right.
Here are some handy tips:
- For business websites, it’s best to align your domain name with your company name and for personal websites or blogs, consider using your full name as the domain name.
- With over 100 million active domain names, finding the perfect one might be challenging. But don’t stress — you can always purchase another domain if needed. If you’re just starting out, you might even be able to snag a free domain in step #2.
- Aim for the .com extension if possible, as it’s globally recognized. Domain names typically end with extensions like .com, .net, .org, .co.uk, .ca, or .de, among others. If you’re targeting a global audience, a .com extension is a good choice. For a local audience in Canada or Germany, consider the .ca or .de extensions.
- There are tools available to check the availability of your desired domain name.
Remember, your domain name is more than just an address — it’s your online identity. Choose wisely!
Many hosting providers offer complimentary domain names when you purchase their hosting services. So, as we’re planning to buy web hosting in the next step, we’ll likely secure a free domain name in the process. Therefore, there’s no need to buy a domain name separately at this stage. Stay tuned for the next steps!
Step 2: Buy web hosting before learning how to make a website.
Selecting a web hosting service is like choosing a digital home for your website. It’s the place where all your website’s data, including code and media, are stored.
Consider it as renting a computer from the hosting providers. You may not have physical access to this computer, or server, but it’s where your website resides in the digital world. It’s a crucial step in making your website available to users worldwide.
The choice of hosting provider largely depends on your level of expertise and understanding of hosting and cloud services.
A common mistake people often make while learning how to make a website is opting for website builder tools like WIX, Odoo, etc. With these website builder you are not actual owner of your websites code, data and monetization. There are other limitations as well with these tools which another topic in itself. It’s highly recommended to avoid these and instead, build your own website using some of the popular content management systems listed below:
- WordPress: A versatile and user-friendly platform that’s great for beginners and professionals alike.
- Joomla: Known for its robustness and flexibility, it’s a good choice for websites that require extensive customizations.
- Drupal: While it may have a steeper learning curve, Drupal offers powerful features for more complex websites.
Remember, the best choice depends on your specific needs and skill level.
If you’re an experienced user with intermediate or advanced skills and are willing to invest a bit more, consider the following cloud service providers:
- Amazon Web Services (AWS): A comprehensive and broadly adopted cloud platform offering over 200 fully-featured services from data centers globally.
- Google Cloud Platform: Provides a suite of cloud computing services running on the same infrastructure that Google uses internally for its end-user products.
- Azure: Microsoft’s public cloud computing platform providing a range of cloud services, including those for computing, analytics, storage, and networking.
- Digital Ocean: Known for its simplicity and developer-friendly platform, it offers cloud servers, databases, storage, and networking capabilities.
On the other hand, if you’re a beginner or new to cloud services, let’s focus on some user-friendly and managed hosting platforms that cater to most of your server needs:
- GoDaddy: Known for its domain registration services, GoDaddy also offers a variety of hosting plans suitable for beginners.
- Hostgator: Offers a range of plans, including shared hosting which is a great starting point for new users.
- Hostinger: Known for its affordable plans, Hostinger is a great choice for beginners looking to host a site.
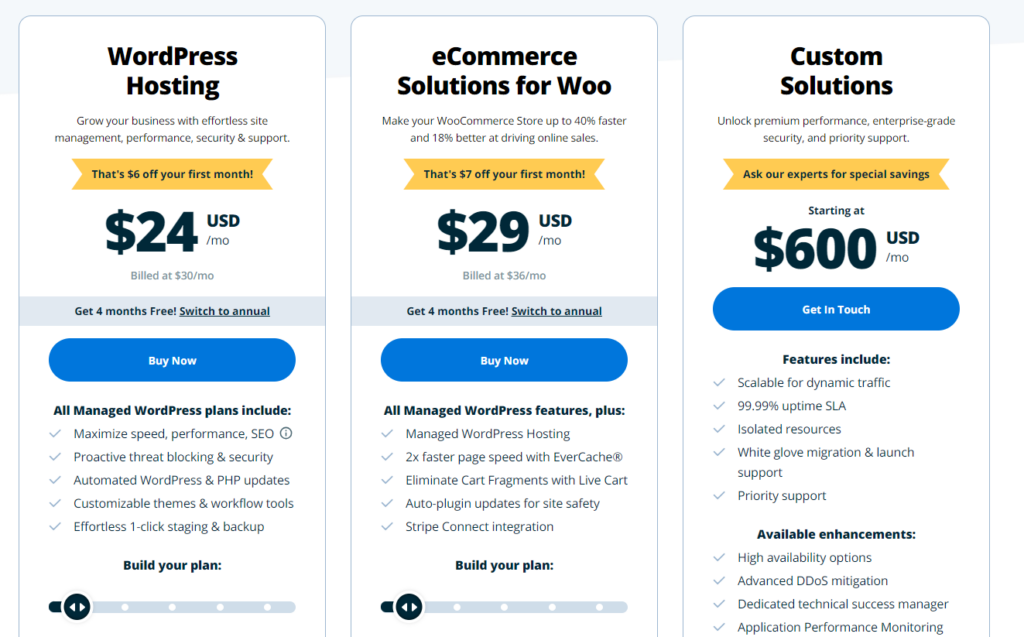
- WP Engine: Simply most advanced and reliable service provider when it comes to WordPress but a bit costlier then others. I you want to get the more premium and managed WordPress hosting experience the WP Engine is for you.
Starting with a basic hosting plan from any of these platforms is a good first step. As you gain more experience and your needs evolve, you can consider upgrading or switching to a more advanced platform. Remember, the best choice depends on your specific needs and budget.
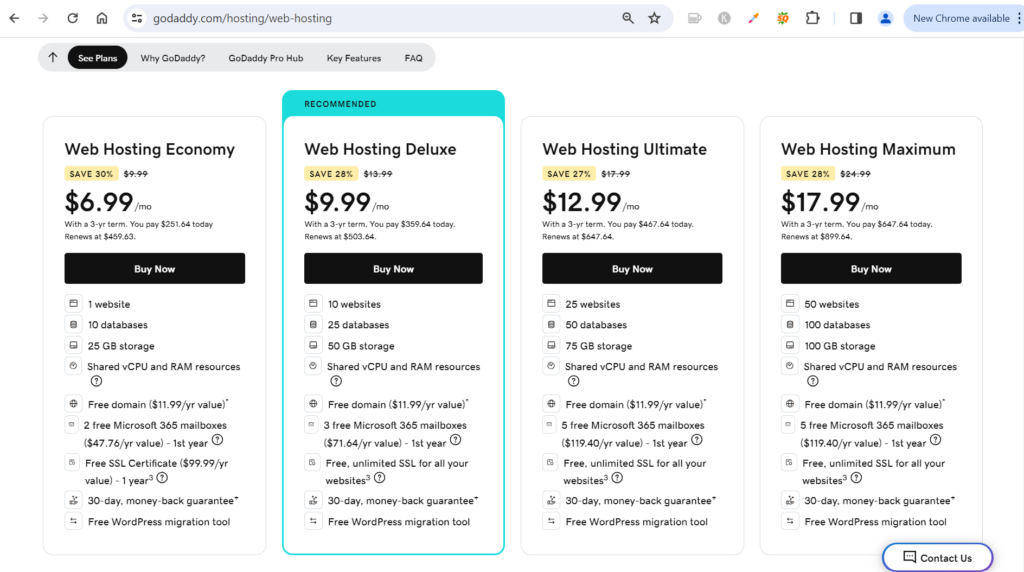
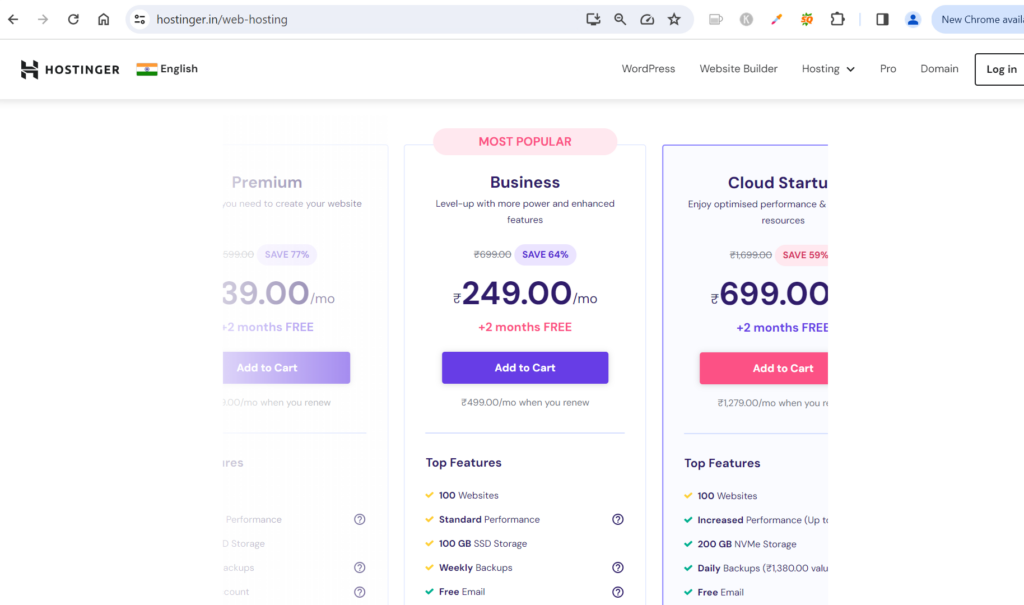
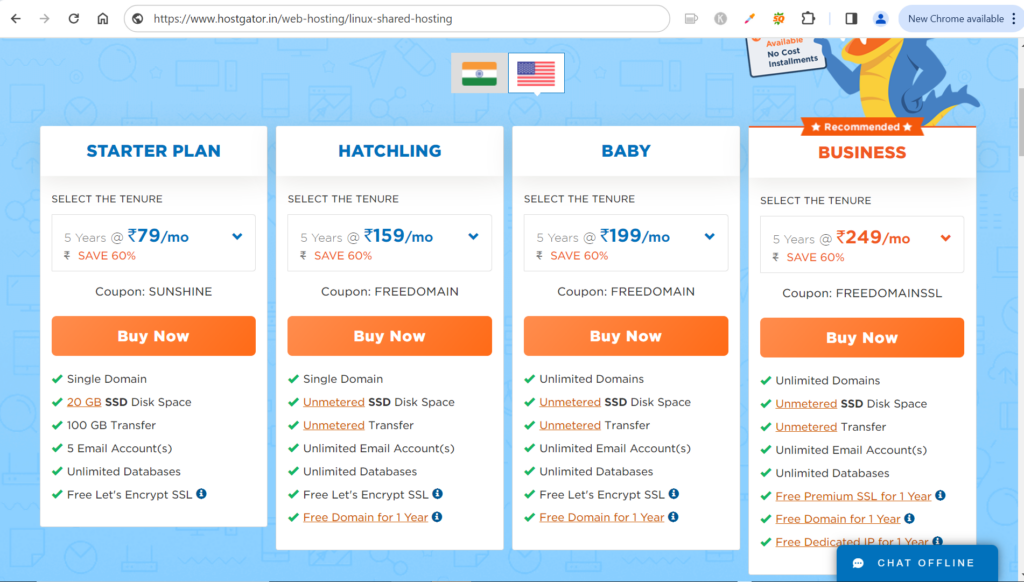
All these hosting providers mentioned here are excellent choices, each offering competitive pricing. You can select any one of them and sign up for their basic plans.
If you’re looking for a step-by-step guide to help you through the registration process, consider the following resources:
- Hostinger Registration Guide: This guide will walk you through the process of setting up a free domain on Hostinger. It’s a great resource for beginners and experienced users alike. You can watch the tutorial on YouTube here.
- GoDaddy Registration Guide: This comprehensive tutorial will guide you on how to set up your website and domain using GoDaddy. It’s user-friendly and easy to follow. Check out the YouTube guide here.
- HostGator Registration Guide: This guide provides a detailed walkthrough on how to register a domain with HostGator. It’s straightforward and ideal for users of all levels. The YouTube tutorial can be found here.
- WP Engine Registration Guide: This is a nice tutorial from on how to get started quickly with WP Engine in a right and quick manner, Please read the blog here.
Remember, the best choice depends on your specific needs and comfort level with the platform.
If you want to set up a website (and register a domain name), simply go to any web hosting provider and sign up.
Step 3: Choose your CMS (Content management system)
Now you have a domain and web hosting setup.
It’s time to select your Content Management System (CMS). If you’re already familiar with a particular CMS, feel free to set it up on your hosting. If not, let’s simplify things for you: go ahead and set up WordPress.
WordPress is a versatile and user-friendly platform that’s great for beginners and professionals alike. It’s the most popular CMS on the internet, powering a significant portion of websites worldwide.
However, if you’d like to make an informed decision, consider the following comparison of the three most popular CMS platforms (WordPress, Joomla and Drupal):
| CMS Platform | Installation | User Interface | Customizability | Content Creation | Community Support | Market Share (2023) | User Community |
|---|---|---|---|---|---|---|---|
| WordPress | Simple and direct, with one-click installs offered by most web hosts. | User-friendly and intuitive, featuring a visual editor and drag-and-drop functionality. | Easy to personalize with a vast selection of themes and plugins, no coding knowledge needed. | Straightforward and easy, thanks to a user-friendly content management system and visual editor. | A large, active community of users and developers providing support, tutorials, and resources. | Over 29.36% among the top 1 million websites. | Largest and most active user community among the three CMS platforms. |
| Drupal | Can be challenging for beginners as it requires technical expertise. | More complex and can be overwhelming for beginners, but offers more control for experienced users. | Highly customizable with a wide range of modules, but requires knowledge of programming languages. | Requires technical expertise for creating custom content types, but offers more control over content management. | An active community of users and developers offering support, tutorials, and resources. | Over 2.72% among the top 1 million websites. | Smaller user community than WordPress, but highly dedicated and technically skilled. |
| Joomla | Generally easy with one-click installs available from most web hosts. | User-friendly but may have a steeper learning curve than WordPress, with a more structured interface. | Requires technical expertise for customization, but offers more flexibility than Joomla. | Offers a balance between ease of use and flexibility, with a simple interface for basic content creation. | A thriving community of users and developers offering niche-focused support, tutorials, and resources. | 1.39% among the top 1 million websites, smaller than WordPress but greater than Drupal. | Active user community, though smaller than WordPress. |
Winner is WordPress!
With all things considered, WordPress is definitely the winner with support from biggest community of developers and largest stack of themes and plugins. You can almost build anything on WordPress be it a blog, ecommerce, social network websites or portfolio websites.
Step 4: Set up your website
It’s time to bring your website to life, and for this example, we’ll be using WordPress.
WordPress is not just a free website builder; it’s the most popular one, powering over 40% of all websites on the internet. It’s straightforward to use and doesn’t require extensive technical knowledge, making it a favorite among beginners and professionals alike.
If you’ve already secured a domain name and web hosting, you’re all set to install WordPress. Many web hosting providers, including Hostinger, GoDaddy and Hostgator offer one-click installations for WordPress, making the setup process a breeze. This means you can have your website up and running in no time, and the best part? It’s completely free!
Remember, creating a website is an exciting journey, and with WordPress, you’re choosing a platform that offers flexibility, ease of use, and a vast community of users and developers ready to help.
For this tutorial we are using Hostinger but even if you have registered with GoDaddy or Hostgator, you can follow these two guides :
Step 1: Log in to your web hosting account.
Go to https://hostinger.com/cpanel-login/ and login with your credentials.
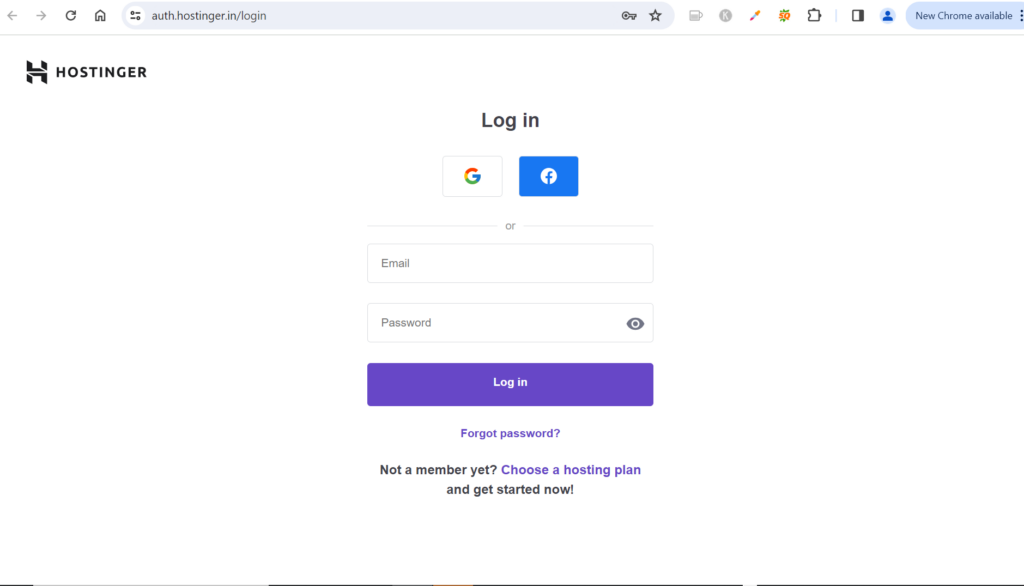
If you are using other hosting providers then you can go to respective login pages.
Step 2: Auto Install WordPress
Installing WordPress is straight forward in most cases.
Like many other hosting providers, Hostinger provides an auto installer using which you can search for WordPress and install it.
In hostinger after logging in, simply navigate to Websites -> Manage. Search for the Auto Installer on the left sidebar and click on that and then:
- Search for WordPress: Within your Hostinger dashboard, look for the WordPress application.
- Enter Basic Information: You’ll be prompted to provide some basic information about your site. This includes the website title, email address, username, and password. Don’t worry, you can always change these details later.
If you encounter any issues while installing WordPress on Hostinger, don’t hesitate to refer to their comprehensive guide. It’s designed to help you navigate through the setup process smoothly.
Remember, setting up your website is the first step in your digital journey. With WordPress and Hostinger, you’re well on your way to creating a dynamic and engaging website.
If you are feeling stuck installing WordPress on Hostinger, read this user guide.
Step 5: Setup and design your WordPress website
Step 1: Personalizing Your Website
Once your WordPress website is set up, you can access the admin panel by visiting yourdomain.com/wp-admin. After logging in, you’ll be directed to your WordPress dashboard. Here, you’ll find the “Appearance” option in the left-hand menu. This is where you can personalize your website’s theme, layout, colors, and fonts.
The “Appearance” tab is essentially your command center for all visual modifications to your website. You’ll find a variety of themes on your WordPress admin dashboard. Each theme offers a unique aesthetic, and you can preview each one before deciding. Once you’ve found a theme that matches your vision, simply click “Install” followed by “Activate”. Remember, you can change your theme at any time. Feel free to experiment and switch themes until you find the one that best fits your website.
Step 2: Organizing Your Website and Adding Pages
After choosing a template, it’s time to organize your website and add key pages. Typically, these include:
- Homepage
- About Us
- Contact Page (where you can add your social media links)
- Our Services/Products
- Blog
- Gallery
- Testimonials/Reviews
Think about the most essential pages for your site and start from there. Make sure these important pages are included in your header and footer for easy site-wide access.
Step 3: Publishing Engaging Content
A website without pages or content isn’t beneficial to anyone. To make your website accessible and engaging, you need to add pages and blog posts. To add pages to your WordPress site, navigate to “Pages” in the left-hand menu and click “Add New”. This will take you to the WordPress block editor. The block editor is user-friendly. If you want to add something to your page, simply choose the appropriate “block” from the menu and fill it in. There are multiple content options to choose from, each serving a different purpose and adding a unique visual element to the page.

Once you’re satisfied with the page, you can make it public or private. The former makes the content visible to any visitor, while the latter means it’s only visible to you via your website dashboard — a useful option when you’re still working on a page. You can also preview the changes you’ve made or schedule a date and time for the page to be published.
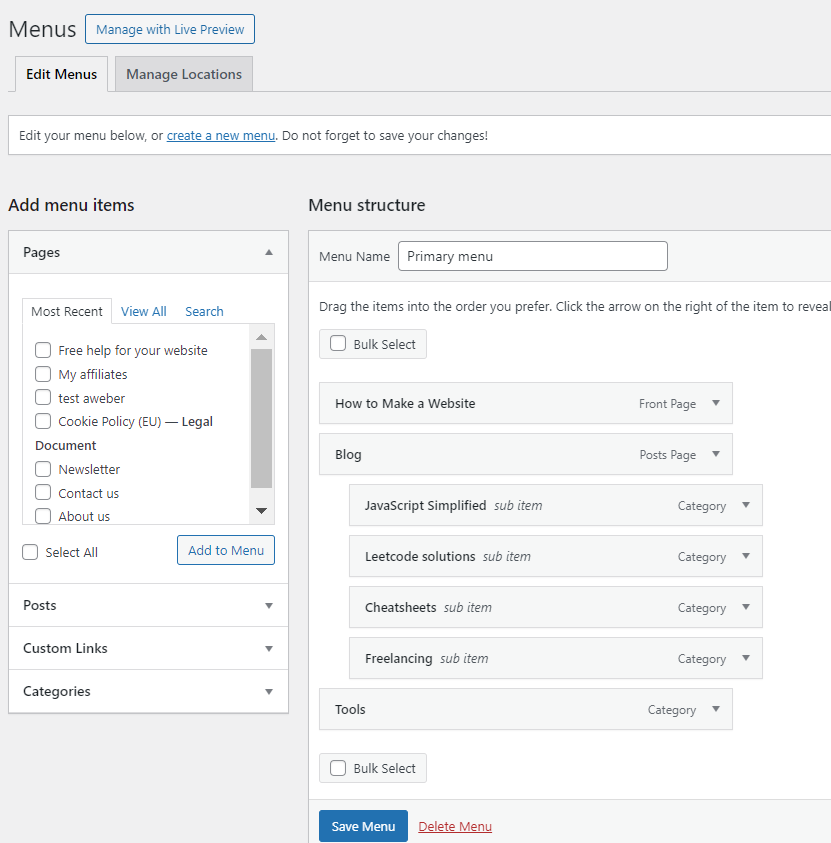
Step 4: Creating a Navigation System
After creating the pages, you need to add them to the navigation (menu) bar. This menu, located throughout your website, provides visitors with access to the rest of your content. In WordPress, you can customize your navigation system by clicking the “Appearance” tab on the left-hand column, followed by “Menus.” After creating the menu, you can start adding and organizing the pages.
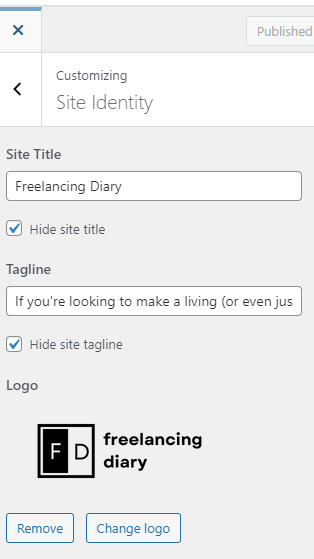
Step 5: Adding Your Logo and Favicon
Now that your website has a solid structure and engaging content, you’re just a few steps away from completion. The final touches involve adding a logo and a favicon, both of which can be easily added via the “Site Identity” menu.
Here’s how to do it:
- Navigate to the “Appearance” option in the left-hand menu and click on “Customize.”
- From there, select the “Site Identity” option.
- Under the “Logo” section, click on “Select Logo” and choose your logo file from your images or upload a new one. Once uploaded, your logo will automatically display on your website.
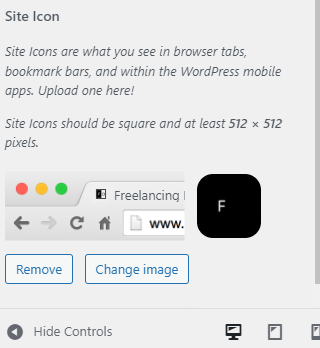
Additionally, if you want your logo to appear next to your website’s name in the URL bar, you’ll need to add a favicon. This can be done in the “Site Identity” menu under the “Site Icon” section.
Congratulations! You have learned how to make a website and your website is now live and ready for the world to see. Should you face any challenges or require assistance with your website setup, don’t hesitate to reach out. Remember, every great website is a work in progress, and it’s okay to ask for help.
Step 6: Connecting Your Website with Google Search Console
Next, it’s crucial to connect your website with Google Search Console, a powerful tool that helps you track your site’s search engine traffic and understand what content is most appealing to your audience. Google Search Console offers a comprehensive overview of your website’s performance, providing essential insights for its maintenance and growth.
Setting up Google Search Console is a straightforward process that should take about 10 minutes. There are plenty of detailed guides available online to walk you through each step. Once set up, you’ll have a valuable resource at your fingertips, helping you make data-driven decisions to optimize your website’s performance.
Remember, learning how to make a website and then building a website is just the beginning. The real journey begins with monitoring, learning, and optimizing.
Now, let’s address some of the most frequently asked questions and common difficulties faced by people while creating a WordPress website:
- How do I start a WordPress blog?
- How much does it cost to build a WordPress website?
- How do I install plugins in WordPress?
- How do I select a theme for my WordPress site?
- How do I add a blog post in WordPress?
- How do I add a navigation menu in WordPress?
- How do I add a contact form in WordPress?
- How do I improve SEO in WordPress?
- How do I install Google Analytics in WordPress?
Common difficulties include:
- Security Vulnerabilities: WordPress websites are a popular target for hackers. Always keep your WordPress installation up to date, and only install well-vetted plugins and themes from reputable sources.
- Slow Performance: Poor website performance or slow loading times can be a common issue. This can be improved by optimizing images, using a caching plugin, and choosing a good hosting provider.
- Overreliance on Plugins: While plugins can add functionality, using too many can slow down your site and create security vulnerabilities.
- Confusing Errors: WordPress users may encounter errors that can be difficult to troubleshoot. There are resources available online to help you understand and fix these errors.
- Unexpected Costs: While WordPress itself is free, there can be costs associated with hosting, premium themes, plugins, and professional development services.